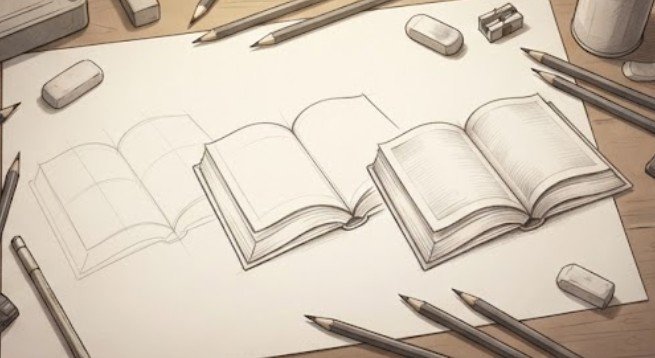
Most people make the same mistake on their first open book drawing: they try to draw both pages as flat rectangles, and the whole thing looks like a door, not a book. Four simple curved lines fix that entirely. This guide will show you exactly how to draw an open book from scratch, walk you through every line in plain language, and give you a handful of open book drawing ideas to take the sketch somewhere interesting once the basics click. Whether you want a quick pencil sketch for a journal cover, a clean outline for a literary zine, or something you can hand off to a ten-year-old, this tutorial covers all of it.
Why Open Books Are a Staple Subject in Small Press Art
The open book is one of the most requested visual motifs across independent publishing. Zine makers, chapbook designers, and literary journal editors reach for it constantly because it communicates reading, story, and imagination in a single image that reads at any size, from a 3-inch sticker to a full cover spread.
According to Print Magazine’s examination of book iconography, the open book as a symbol dates back to medieval manuscript illumination and has been reinvented in design movements from Art Nouveau to contemporary flat illustration. That resilience is exactly why learning to draw it well pays off for anyone working in the small press or self-publishing space.
The shape is also genuinely forgiving. A simple open book drawing does not require straight lines or perfect symmetry. The slight wobble in a hand-drawn spine actually adds warmth. So if you are worried your hand is not steady enough, good news: it does not need to be.
Tools You Need Before You Start
You do not need much. For a clean open book pencil drawing, grab a standard HB pencil for initial construction lines, a 2B for darker final lines, and a kneaded eraser that lifts graphite cleanly without tearing paper. A fine-liner pen, something in the 0.3mm to 0.5mm range, is great if you plan to ink over the pencil sketch for print use.
Paper matters more than people admit. Smooth Bristol board holds crisp ink lines and erases cleanly. Regular 90gsm copy paper works fine for practice. If you are drawing for reproduction in a zine or chapbook, scan at 600 DPI in grayscale to keep your open book outline drawing sharp.
Digital artists can follow this same tutorial in Procreate or Clip Studio Paint using a basic round brush set to 100% opacity. The geometry is identical whether you work on paper or a tablet.
How to Draw an Open Book: The Full Step-by-Step Method
This is the core of the tutorial. Run through these steps in order, and do not skip the construction phase. Rushing past the basic shapes is how you end up with a lopsided book that frustrates you.
Step 1: Draw the Center Spine
Start with a single slightly curved vertical line running from top to bottom near the center of your page. This is the book’s spine, and the gentle curve is what makes the book look open rather than flat. Keep it short, around 2 inches on a standard sheet. This one line establishes the entire perspective of your drawing, so take your time with the curve.
Step 2: Build the Left Page
From the top of the spine, draw a gently curved line going up and to the left, then bring it down to form the outer edge of the left page, and close the bottom with another slightly curved line back to the base of the spine. Think of it as a shallow banana shape. The slight curve on the top and bottom edges is what sells the illusion that the page has weight and paper flexibility. This step is where most beginners go wrong by drawing a flat trapezoid instead.
Step 3: Build the Right Page
Mirror the process on the right side, though the curves do not have to be perfect mirrors. A real open book rarely sits in perfect symmetry. Give the right page a slightly different angle if you want a more natural, organic feel. This asymmetry is actually something professional illustrators build in intentionally.
Step 4: Add the Cover and Spine Thickness
Below the bottom edge of both pages, draw a thin rectangular strip connecting the two lower corners. This strip represents the book’s cover and spine base. Add a small curve at the very bottom of the spine to suggest the binding. You can also draw a subtle second line just inside the outer edges of each page to suggest the page thickness, a stack of paper showing at the outer edges.
Step 5: Sketch the Inner Page Lines
Add two or three lightly curved horizontal lines on each page to represent text or ruled lines. These should curve very slightly downward toward the spine, following the natural droop of paper. Do not make them perfectly straight or the page will look stiff. For a how to draw open book for kids version, you can skip this step entirely and leave the pages blank, which actually looks clean and versatile.
Step 6: Refine and Ink
Once your pencil construction lines are where you want them, go over the final shapes with a darker pencil or a fine-liner. Use slightly thicker lines on the outer edges and thinner lines for interior details like page lines and the spine curve. Erase all construction marks after the ink dries if you used a pen. This refinement stage is where your open book pencil drawing transforms from a rough sketch into something print-ready.
Step 7: Add Shading or Details
A light shadow cast below the book and a soft gradient from the spine outward to each page edge gives the drawing a three-dimensional quality. For a flat, graphic style common in zine illustration, skip shading entirely and rely on the clean outline. Both choices are valid depending on how the art will be used.
How to Draw Open Book Easy: A Simplified Version for Kids and Beginners
If the seven-step version feels like too much, here is a stripped-down approach. This how to draw open book easy method gets you a recognizable result in about four minutes. It is genuinely the right starting point for anyone who has never tried open book drawing for beginners before, and it works great as a first exercise for younger artists too.
Draw a wide V shape, gentle and rounded, not sharp. That V is your spine and the basic opening angle of the book. From the top of each arm of the V, extend a curved line outward and slightly upward, then bring it back down to form the top of each page. Connect the outer bottom corners with a flat line for the cover base. Done. You have a readable open book shape in under ten lines.
This simplified version is exactly the kind of easy open book drawing that works on handmade bookmarks, rubber stamp designs, and linocut prints. The simplicity is the point, not a limitation.
“The most powerful illustrations in independent publishing are the ones that communicate their subject in the fewest possible marks. A three-line book silhouette on a chapbook cover can carry more visual weight than an elaborate scene.” Noted by illustrator and zine educator Jessica Abel in her resource Out on the Wire, discussing the economy of visual language in literary art.
Open Book Drawing for Beginners: Common Mistakes and How to Fix Them
Three mistakes show up in almost every beginner’s first attempt. Knowing them in advance saves you from the frustration of restarting.
Flat pages. If your pages look like playing cards rather than curved paper, your top and bottom edges are too straight. Add more arc to those lines. The curve should be subtle, not dramatic, maybe a 5 to 10 degree bow on a page that is 3 inches wide.
A spine that looks like a seam, not a curve. The spine of an open book bends. If your center line is perfectly straight, the book will look closed or odd. Give it a slight forward curve, as if the binding is being pressed open.
Pages that are the same size. Unless your book is lying completely flat, one page will be slightly larger than the other depending on viewing angle. This asymmetry adds realism. Lean into it rather than fighting for perfect symmetry.
These corrections apply whether you are working on a detailed how to sketch open book study or a fast simple open book drawing for a quick visual project. The physics of a real book do not change based on how detailed your drawing is.
Open Book Drawing Ideas to Push the Sketch Further
Once you can draw the basic form confidently, the subject becomes a launching pad. Here are five directions worth exploring, each one suited to a different kind of small press or literary illustration project.
- Floating words: Let letters or single words drift off the open pages as if they are lifting into the air. This works beautifully for poetry chapbook covers.
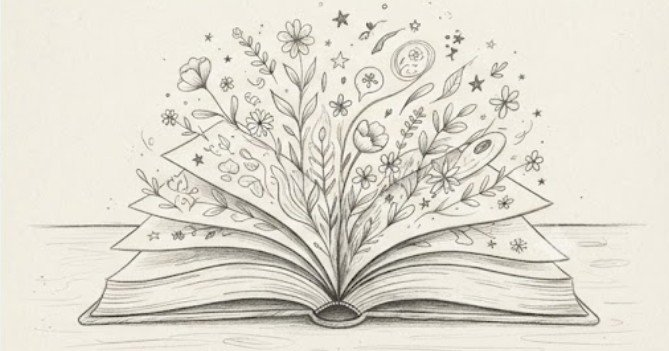
- Botanical integration: Vines, leaves, or flowers growing out of the spine turn the book into a living thing. A common motif in nature writing publications and hand-letterpress work.
- Architectural perspective: Draw the book from a dramatic low angle so it looms large. Adds a sense of gravitas that suits literary fiction covers.
- Minimal ink with texture: Use hatching only on the shadow side of each page and leave the rest open. This produces a woodcut-like quality that prints well in single-color risograph.
- Books within books: Draw a tiny scene inside the open pages as if the book is a window into another world. Classic surrealist territory and hugely popular in zine illustration right now.
These open book drawing ideas are not just aesthetic choices. They are communication choices. Each one signals a different genre and emotional register to a reader browsing a table at a zine fair.
How to Draw Open Book Step by Step: Comparing Hand-Drawn vs. Digital Approaches
People ask constantly whether they should learn to draw open book shapes by hand or go straight to digital. My honest opinion: start on paper, always. The physical resistance of a pencil on paper forces you to slow down and feel where a line is going wrong. You can not undo a pencil mark instantly, so you develop better line confidence faster.
That said, digital tools have real advantages for production work. The table below lays out the practical differences between the two approaches for someone creating art destined for print in a small press context.
| Factor | Hand-Drawn (Pencil/Ink) | Digital (Procreate / Clip Studio)
|
|---|---|---|
| Line character | Organic, variable, warm | Consistent, clean, can mimic analog |
| Correction speed | Slow (eraser, redraw) | Instant (Ctrl+Z) |
| Print resolution | Requires scanning at 600 DPI | Native vector or high-res raster |
| Skill development speed | Faster muscle memory | Slower without tablet pressure sensitivity |
| Cost | Under $15 for full setup | $13 to $80 per month or one-time app purchase |
| Best for | Zine interiors, stamp art, risograph | Full covers, scalable logos, color work |
For most people working in small press publishing, the ideal workflow is hand-drawn sketches scanned and cleaned up digitally. You get the organic quality of a real pencil line combined with clean, reproducible files.
Open Book Outline Drawing: Using Your Sketch as a Design Element
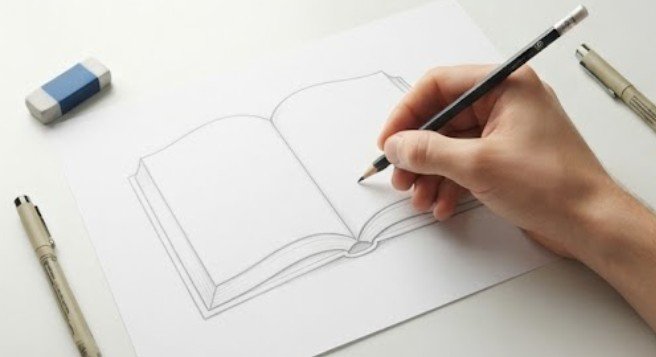
A clean open book outline drawing is one of the most versatile design assets a small press publisher can have. Strip the sketch down to its bare contour lines, scan it, and you can use it as a recurring visual brand element across a publication’s issues, merchandise, and social media.
The key to making an outline drawing work at scale is consistent line weight. If you ink your drawing with a 0.5mm fine-liner and keep all lines at roughly the same thickness, the result scales cleanly from a half-inch icon to a poster-size print. Variable line weight is beautiful in expressive illustration but creates reproduction headaches in small press production where a photocopier or risograph printer will interpret thick and thin lines differently.
The Printer’s Devil’s guide to risograph printing has a thorough breakdown of how line weight and ink density interact in spot-color printing, which directly affects how your open book outline drawing will reproduce. Worth reading before you finalize any art going to press.
Also worth noting: if you plan to use your open book outline drawing as a repeating pattern across a cover or endpaper, you will want to establish a consistent viewing angle across all instances. Mixing a front-on view with a slight overhead angle looks accidental rather than intentional. Pick one perspective and stick with it across the whole design system.
How to Draw Open Book for Kids: A Parent or Teacher’s Quick Guide
Teaching this subject to children works best when you break it into just three moves. Kids do not need to hear about perspective or line weight. They need a sequence they can remember and repeat on their own.
Tell them to draw a smile shape for the bottom of the book, a rainbow shape for the top of each page, and two bumpy mountains in the middle for the spine. That is it. Those three descriptors map directly onto the actual geometric shapes of the book, but they use visual metaphors a seven-year-old can hold in their head.
From there, kids naturally start adding their own details: stars, hearts, scribbled text, favorite characters peeking over the pages. The how to draw open book for kids version is really just the adult version with the geometric jargon replaced by playful description. The underlying shapes are identical.
For a classroom or workshop setting, consider having kids draw a book opened to a specific scene from a story they have read. It turns the drawing exercise into a reading response activity and ties directly into literacy goals. The Scholastic guide on art and literacy connections has solid frameworks for exactly this kind of integrated lesson.
The Fastest Way to Learn to Draw Open Book Shapes Consistently
These are different that fiction books that challenge your perspective. Repetition beats instruction every time. If you want to learn to draw open book forms until they feel automatic, run this drill: fill one sheet of paper with nothing but open book sketches drawn in under 60 seconds each. No erasing, no refining. Just construction lines, fast.
Do this three days in a row and you will notice something useful: your hand starts making the spine curve and page arcs instinctively. The shape stops feeling like a problem to solve and starts feeling like a gesture. That is when your how to draw open book step by step knowledge becomes genuine drawing fluency rather than a procedure you have to consciously recall.
This kind of gesture practice is how professional illustrators develop their visual vocabulary. A single recognizable form, repeated at speed until it becomes automatic, then layered with detail once the underlying gesture is solid. The open book is a perfect subject for this because its core shape is simple enough to draw in under ten seconds once you know it.
Checklist: Before You Call Your Open Book Drawing Finished
Run your drawing against these checks before you scan it or hand it off for production. This is the same review I use on any open book drawing tutorial result before it goes to print.
- The spine has a visible curve, not a straight line.
- Both pages have curved top and bottom edges, not flat horizontal lines.
- The page edges show a slight thickness at the outer margins.
- Interior page lines curve gently toward the spine rather than running perfectly horizontal.
- The cover base is present at the bottom, even if thin.
- Line weights are consistent with your intended reproduction method.
- The overall proportions feel like a book, not a butterfly or a tent.
If all seven check out, your drawing is ready. If one or two are off, go back to just those elements rather than redrawing from scratch. Targeted correction is faster and teaches you more than starting over.
How to Draw an Open Book and Make It Your Own
Every illustrator working in small press eventually develops a personal version of this shape. This is one of the books to be considered a library. Some draw books with dramatically exaggerated curves that look almost cartoonish. Others render tight, architectural forms with precise hatching. Neither approach is more correct. The right style is the one that fits the publication’s voice and reproduces well in your chosen print medium.
Study the open book forms used by publications you admire. Pull apart how their covers handle the spine, the page edge, the viewing angle. You will start to see that most strong book illustrations are built on the same seven steps described in this tutorial, just pushed further in one direction or another.
The open book drawing tutorial you just worked through is a foundation, not a ceiling. Take the form somewhere the instructions did not go. That is the actual point of learning it.
So: what will your open book hold? That question matters more than whether your lines are perfect.