Most people mess up their first book drawing in the same spot: the spine. They get the flat cover right, then the whole thing collapses into a flat rectangle that looks nothing like a real book. Here’s the fix, and everything else you need to know. This guide walks you through exactly how to draw a book from scratch, covering perspective, shading, pages, and beyond. Whether you’re picking up a pencil for the first time or brushing up on your illustration skills, you’ll find a method here that actually works. By the end, you’ll have a solid, convincing book drawing and a handful of creative directions to take it.
Why Learning How to Draw a Book Matters for Small Press Artists
If you’re connected to the world of small press publishing, zines, chapbooks, or literary art, the book as a visual symbol is almost unavoidable. It shows up on covers, in promotional materials, in author portraits, and across social media graphics. Knowing how to draw a book gives you a fast, flexible icon you can customize for virtually any project.
The book is also one of the most instructive objects to draw from a technical standpoint. It has three distinct planes visible at once when placed at an angle, it has texture variation between the cover and pages, and it rewards understanding basic perspective. Nail this, and you’ve quietly trained your eye for a dozen other subjects.
According to the Association of American Publishers, small press output has grown steadily over the past decade, with thousands of independent titles entering the market each year. That creative ecosystem thrives on visual identity, and a well-drawn book is one of the simplest, strongest visual assets any small press creator can have.
Tools You Need Before You Start

Keep your setup simple, especially at first. A book pencil drawing requires very little gear, and overloading yourself with supplies before you understand the fundamentals is a reliable way to stall your progress. How to use active voice can also help you write clearer notes or instructions alongside your creative work, especially when you’re documenting your drawing process.
- A standard HB pencil for your initial sketch lines
- A 2B or 4B pencil for shading and deeper values
- A clean eraser, preferably a kneaded eraser for soft corrections
- Plain printer paper or a dedicated sketchbook
- A ruler for getting your angles consistent in the early stages
Once you’re comfortable, you can move into pen and ink, colored pencils, or digital tools. But the pencil foundation is where every good book outline drawing begins, and rushing past it tends to show in the final result.
How to Draw a Book Step by Step
This is the core of the whole guide. Follow these steps closely, and don’t skip the perspective setup even though it feels like extra work. That setup is what separates a flat, lifeless rectangle from something that actually looks like a book sitting on a table.
Step 1: Draw the Front Cover Shape
Start with a parallelogram, not a rectangle. A rectangle gives you a flat, face-on view. A parallelogram tilted slightly to one side creates the illusion that the book is resting at an angle, which is far more interesting visually and much more realistic. Draw two vertical lines of equal length, then connect them with two diagonal lines. The top and bottom diagonals should run parallel to each other.
Step 2: Add the Spine
From the left vertical edge of your parallelogram, draw a narrow vertical rectangle going to the left. This is the spine. Its height matches your front cover’s vertical edges exactly. The width of the spine depends on how thick you want the book to look. A slim poetry chapbook might have a spine that’s about one-tenth the width of the cover. A thick novel gets a spine that’s nearly half as wide. Get that proportion right and your book drawing already reads as convincing.
Step 3: Build the Pages
This is where most beginner book drawings fall apart. The pages appear at the top, bottom, and right edges of the book as a band of slightly uneven texture. Draw a thin strip along the top edge of the cover, parallel to the top diagonal but offset about 4 to 6 millimeters upward. Do the same at the bottom. On the right side, draw a curved or slightly jagged vertical band to suggest the fanned-out page edges. Add a few light, close-together horizontal lines within these bands to sell the illusion of individual pages.
Step 4: Refine the Cover Lines

Go back over your main cover shape with a slightly firmer line. If you want to add a title line, draw two thin parallel horizontal lines across the upper third of the front cover and one thinner line below them for an author name. You don’t need actual words for this to read as a book cover. The suggestion is enough.
Step 5: Shade for Depth
Decide where your light is coming from. Light from the upper left is traditional and easy to work with. The front cover gets a mid-tone fill. The spine, which faces a slightly different direction, gets a slightly darker value. The page edges on the right side get your lightest treatment since they catch the most light. Use short, even hatching strokes or a smooth circular shading motion. Blend with your fingertip or a paper stump if you want a cleaner finish.
“Drawing everyday objects like books trains your eye to see three-dimensional form in a way that pure figure study sometimes misses. The book’s geometry is deceptively instructive.”
That observation comes from conversations in the broader illustration education community, echoed by instructors at institutions like Rhode Island School of Design, where observational drawing of ordinary objects remains a core part of the foundation curriculum.
Easy Book Drawing: Simplified Versions for Different Skill Levels
Not every situation calls for a fully rendered book pencil drawing. Sometimes you need a quick, clean icon. Sometimes you’re teaching a child. Here are four approaches ranging from the most simplified to the most detailed, so you can pick the right level for your actual need.
|
Approach |
Time Required | Best For |
Key Feature |
|---|---|---|---|
|
Flat icon book |
2 to 3 minutes | Logos, quick sketches | Two rectangles, no perspective |
| Simple book drawing with perspective | 10 minutes | Beginners, kids projects |
Spine added, minimal shading |
|
Full cover illustration |
30 to 45 minutes | Intermediate artists | Page edges, cover design, full shading |
| Open book drawing | 20 to 30 minutes | Editorial illustration, literary art |
Curved pages, symmetrical spread |
The flat icon version is honestly underrated. For a small press logo or a social post, a clean two-rectangle book outline drawing with a simple diagonal accent communicates “book” instantly without any rendering at all. Don’t let simplicity feel like cheating.
How to Draw Book Easy: The Shortcut Framework
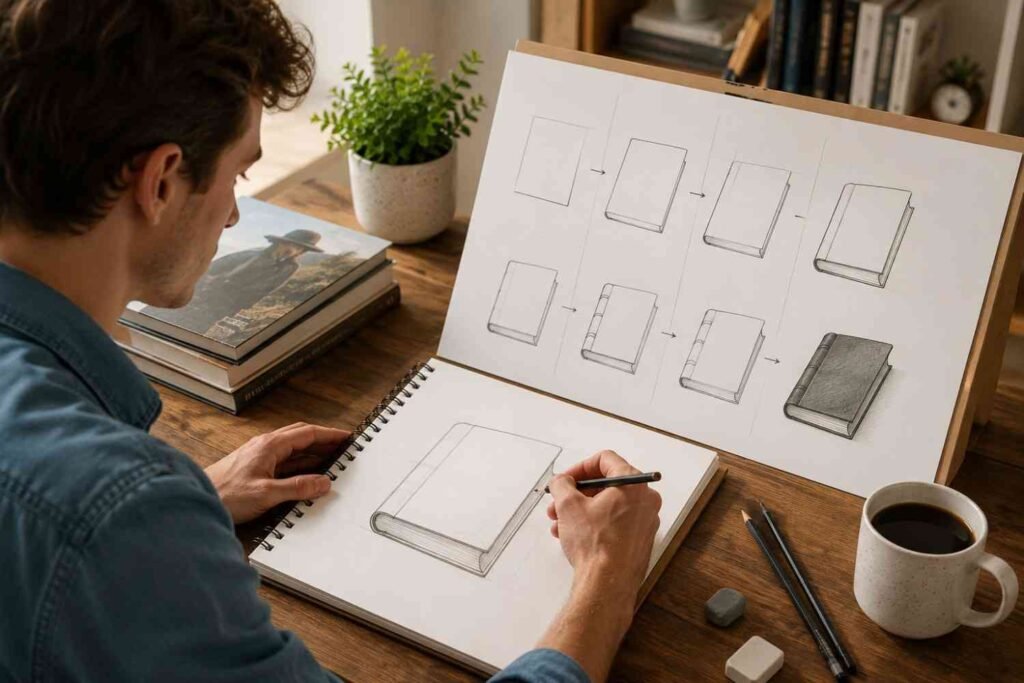
I call this the Box-Spine-Edge framework, and it works every single time for producing an easy book drawing in under ten minutes. You don’t need to understand two-point perspective formally to apply it. Here’s how it breaks down.
Box: Draw any four-sided shape that isn’t perfectly square. Slight diagonal gives depth. This is your front cover.
Spine: Attach a narrow vertical strip to the left side. Match the height of the cover exactly. Shade this strip one value darker than your cover fill.
Edge: Add a thin band along the right and top and bottom edges to suggest page thickness. A few short horizontal lines inside this band complete the illusion.
That’s the entire framework. Everything else, title lines, decorative cover art, cast shadows, is optional embellishment. If you can draw those three elements, you know how to draw book easy at a functional level. The rest is refinement.
Book Drawing Tutorial: How to Draw an Open Book
The open book is a completely different challenge from the closed one, and it’s probably the most common book drawing ideas you’ll see in literary and editorial contexts. Here’s the approach that works best.
Setting Up the Center Gutter
Draw a horizontal line. From the center of that line, draw a slightly curved vertical line going upward. This curved vertical is the spine’s binding, and its curve is what makes the open book feel soft and real rather than stiff and mechanical. The curve should bow slightly toward the viewer.
Drawing the Two Page Spreads
From the top of your center curve, extend two diagonal lines outward to the left and right, angling them slightly downward. These form the top edges of your two open pages. Then bring lines down from those outer endpoints to meet a bottom horizontal edge. Each page is a trapezoid shape, wider at the outer edge and narrower toward the center binding.
Adding Page Curl and Lines
Add a subtle curve to the bottom inner corners of each page to suggest they’re resting against the binding rather than lying perfectly flat. Draw horizontal ruled lines across both pages with a very light touch. These lines should converge slightly toward the center gutter following the perspective of the page shape. Don’t make them perfectly parallel or the page will look flat again.
Book Drawing for Beginners: Common Mistakes and How to Avoid Them
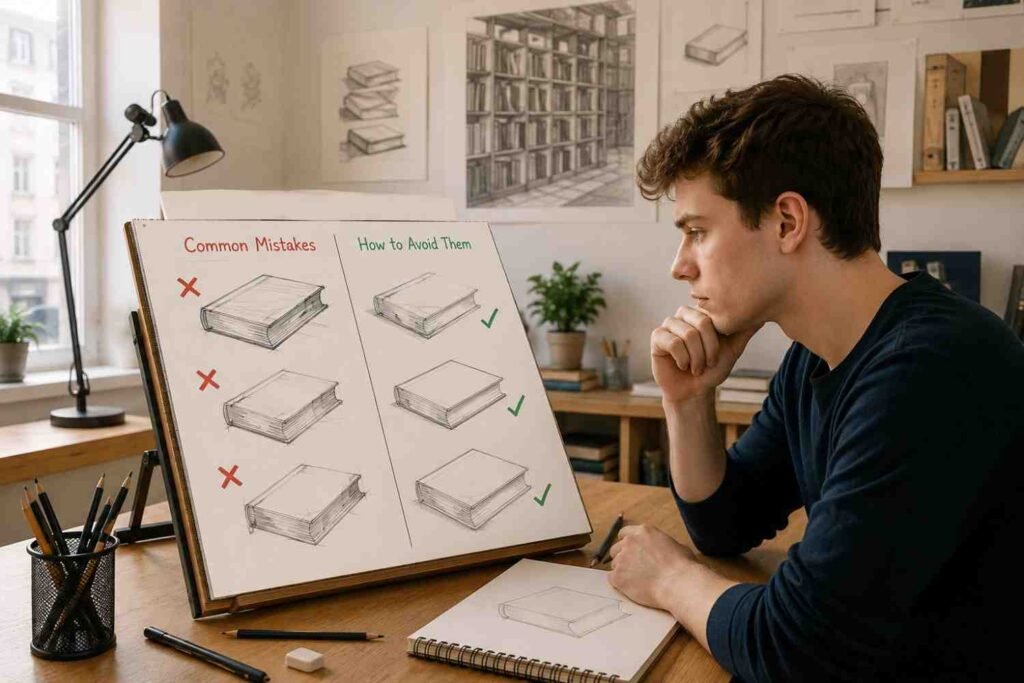
Book drawing for beginners tends to run into the same four problems. Knowing them in advance saves you a lot of frustration and erasing.
The first problem is making the spine too wide. A book spine that’s as wide as the cover makes it look like a brick or a box, not a book. Unless you’re drawing a dictionary, keep the spine narrow.
The second problem is drawing the page edges as a perfectly smooth straight line. Real page edges are slightly uneven from years of use. A tiny bit of irregularity in your line makes the drawing feel authentic immediately.
The third problem is skipping the value difference between the cover and spine. If both surfaces are the same tone, the 3D illusion collapses. Even a small shift in darkness between cover and spine reads as a corner turning in space.
The fourth problem is using a line that’s too heavy for the entire drawing from the start. Start light, refine, then commit with a darker line. This applies to book pencil drawing and to digital work equally.
How to Draw Book for Kids: Keeping It Fun and Simple
Teaching kids how to draw book for kids activities works best when you strip away everything except the essential shapes and add a story element. Kids engage with purpose, not technique. So give the book a character. How to improve sentence structure and flow is another useful skill when explaining creative activities, because clear instructions make it easier for children to follow each step.
Tell them they’re drawing a magic spell book, or a treasure map book, or their favorite story’s cover. Then walk them through the simple book drawing approach: one rectangle for the cover, one narrow strip for the spine, a wavy line along the right edge for pages. That’s all you need for a recognizable, satisfying result that a five-year-old can complete independently in a few minutes.
The decorating step is where kids really take off. Stars, swirls, their name as the author, a dragon on the cover. Let the drawing scaffold their imagination rather than just train their hand. That’s the version of how to draw book for kids that actually sticks with them.
The American Institute of Graphic Arts has long advocated for visual literacy education beginning at early ages, pointing out that children who engage with drawing as a communication tool develop stronger design thinking skills over time. A simple book outline drawing activity fits that goal perfectly.
How to Sketch Book Covers With Personality
Once you have the basic form down, knowing how to sketch book covers that feel distinctive is where things get genuinely interesting. This is where the learn to draw book journey shifts from technical exercise to creative expression.
Consider these five directions for developing a cover sketch with real character:
- Worn and vintage: rough edges, slightly bowed cover, creased spine, faded title lines
- Graphic and bold: clean geometric shapes on the cover, strong contrast, minimal line count
- Stacked books: two or three books at different angles piled on top of each other, great for literary art and bookshop graphics
- Book with a bookmark ribbon: adds an instant vertical element that breaks up the geometry interestingly
- Book with objects resting on top: a magnifying glass, a quill, a coffee cup, these give narrative context without adding text
The stacked books composition is my personal favorite for small press promotional work because it implies quantity and variety without being specific about any one title. It reads as “books” broadly, which is exactly what you want when you’re representing a press rather than a single volume.
Book Drawing Ideas: Taking Your Sketch Beyond the Basics
If you’ve mastered the fundamentals and are looking for book drawing ideas that push your skills further, here are four directions worth exploring.
Cross-section view: Draw the book as if it’s been sliced open vertically, showing the layers of pages, the binding glue, and the cover board. This is technically demanding but produces genuinely striking editorial illustration.
Books in an environment: Draw a single book on a shelf with other spines visible in the background. The depth-of-field challenge this creates is excellent practice for understanding how to sketch book objects in context rather than isolation.
Exploded diagram: Pull the book apart visually, showing cover, pages, and spine as separate components that float in space with thin connecting lines. This reads as both technical and artistic, and it’s a great fit for zine covers or small press identity graphics.
Book with dramatic lighting: Place your light source directly behind or to the extreme side of the book, creating a strong silhouette or a single bright edge. This is one of the most effective book drawing ideas for creating emotional impact with minimal detail.
The Learn to Draw Book Method: A Structured Practice Plan
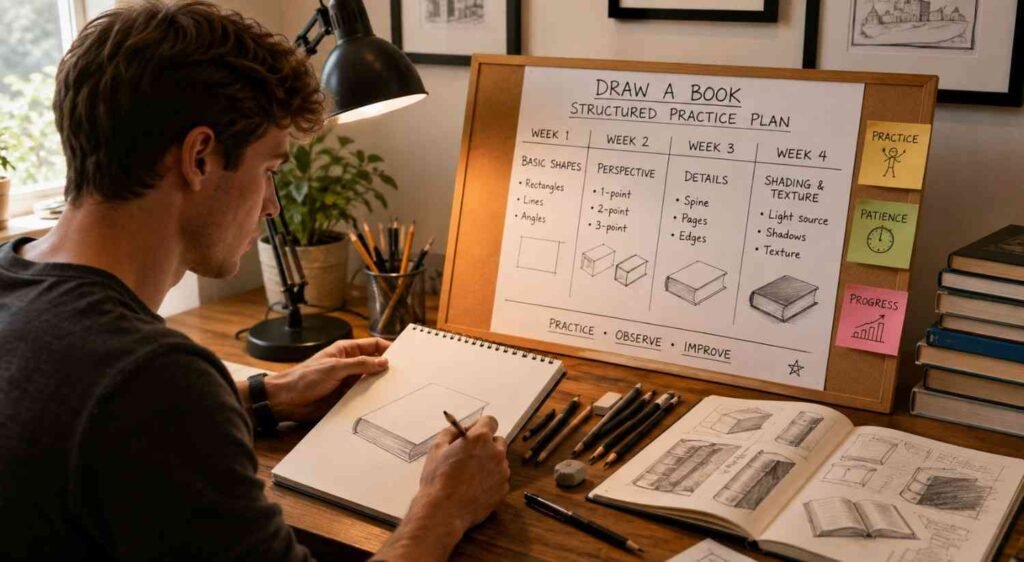
If you want to actually build the skill rather than just follow one tutorial once, here’s a four-week practice structure. This is the learn to draw book approach that I’d recommend to anyone serious about developing this as a working skill for small press illustration work.
Week 1: Draw the closed book in three-quarter view every day. Five drawings per session, each one slightly different in proportion. Focus on getting the spine width and page edge bands consistent. Simple book drawing, nothing fancy.
Week 2: Add shading to each drawing. Experiment with different light source positions. Notice how each position changes which surface is darkest. This is pure observational training disguised as book pencil drawing practice.
Week 3: Switch to the open book form. Draw it from memory first, then correct it by looking at a real open book. The gap between your memory version and the observed version tells you exactly what your eye hasn’t learned to see yet.
Week 4: Combine elements. Stacked books, books with objects, books in environment. Apply the book outline drawing skills you’ve built in the context of a fuller composition.
By the end of week four, how to draw a book is no longer a question you need to ask. It’s just something you can do.
How to Draw a Book Digitally vs. on Paper
The core principles of how to draw a book don’t change between digital and traditional media, but the workflow does. On paper, you commit with each mark and use erasure sparingly. Digitally, you work in layers, which means you can rough in your structure on one layer, refine on a second, and add shading on a third without any interference.
For digital book drawing tutorial work, tools like Procreate on iPad or Clip Studio Paint on desktop are the two I’d point most small press artists toward. Both have perspective guide tools that snap your lines to consistent angles automatically, which is a genuine help when you’re learning the geometry of how to draw book step by step in a digital environment.
That said, I believe the paper version teaches you more per hour of practice. The commitment of pencil marks, the physical texture of the page, the relationship between hand pressure and line weight: none of that translates directly to a stylus and screen. Do both, but lean on paper first.
Quick-Reference Checklist for a Complete Book Drawing
Use this before you call any drawing finished. Every item here corresponds to something covered in this guide, and skipping even one of them usually shows in the final result.
- Front cover is a parallelogram, not a flat rectangle
- Spine height exactly matches the cover’s vertical edges
- Spine width is proportional to intended book thickness
- Page edge bands appear on all three non-spine sides
- Horizontal line texture is inside the page edge bands
- Cover and spine are two visibly different tonal values
- Page edges are the lightest area in the drawing
- Optional cover design elements are consistent in scale
- Cast shadow is present if the book is meant to rest on a surface
- Lines are cleanest at the final pass, not the first draft
Print this out, tape it next to your sketchbook, and check it against every book drawing you do for the next month. You’ll stop second-guessing your drawings much faster.
How to Draw a Book: Putting It All Together
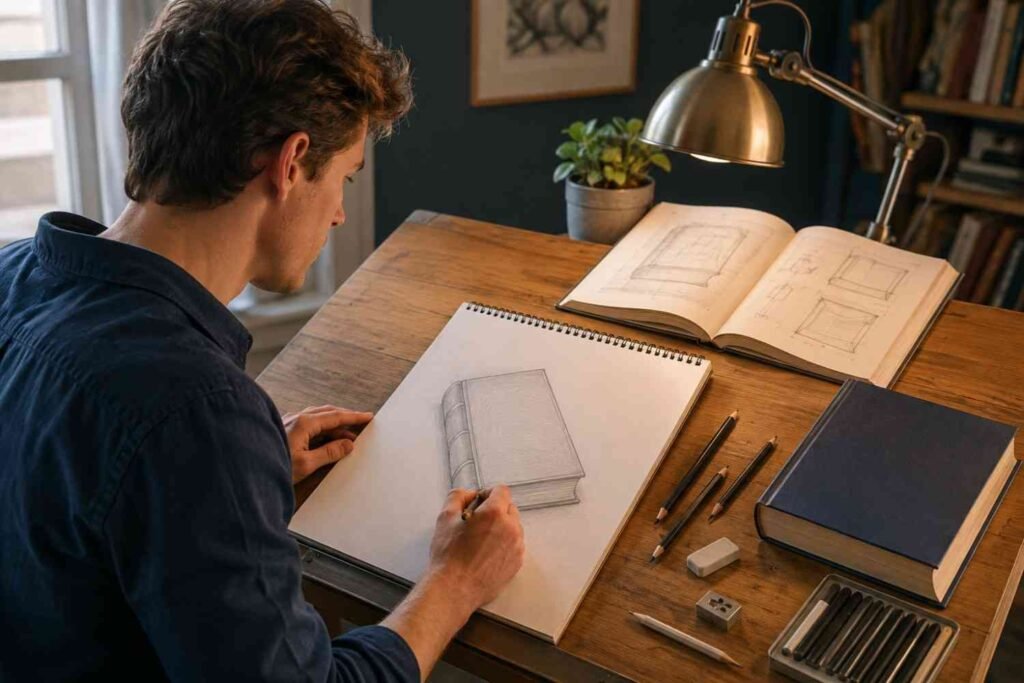
Everything in this guide connects back to one idea: the book is a simple geometric object that rewards careful observation. Once you understand how to draw a book at a structural level, the creative decisions become much easier because you’re not fighting the form anymore. You’re working with it.
The Box-Spine-Edge framework handles your easy book drawing needs. The step-by-step method in the tutorial section handles anything more demanding. The four-week practice plan builds the skill so it stays with you. And the book drawing ideas at the end give you somewhere to go once the basics are solid.
Small press artists, in particular, have a practical reason to develop this skill beyond the purely artistic one. A book is your product, your symbol, and often your logo. Being able to draw it with confidence and speed is a genuinely useful professional capability. Developing that confidence can also help you find your unique writing voice when you create the stories, descriptions, and promotional material that surround your artwork.
So: what’s the first book drawing idea from this guide that you’re going to try? Start there, and see where it takes you.