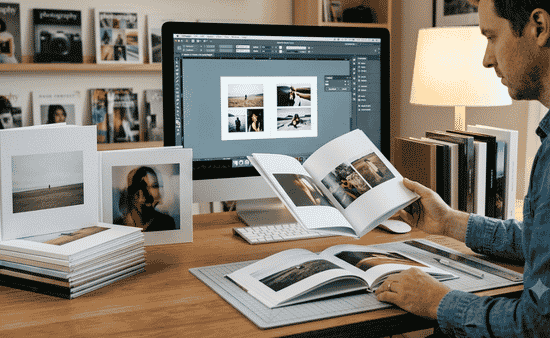
Most people have thousands of photos sitting in a cloud folder that nobody ever looks at. That is not a memory. That is a hard drive. Learning how to make a photo book is the fastest way to turn those forgotten shots into something your family will actually pick up, flip through, and keep for decades.
This guide covers every step, from picking the right platform to nailing your layout, choosing your paper, and pressing “order” with confidence. Whether you want a polished hardcover for a wedding or a casual softcover for a road trip, you will find a clear path forward here.
Why a Printed Photo Book Beats a Digital Gallery Every Time
Screens fatigue people. A digital photo book viewed on a phone gets scrolled past in thirty seconds. A physical book sits on a coffee table and gets opened for fifteen minutes at a time, sometimes years after you made it. There is real science behind this. HP’s Print and Prosper research found that printed photos are recalled more vividly and generate stronger emotional responses than the same images viewed on a screen.
That said, a digital photo book in PDF or flipbook format still has genuine value for sharing with relatives who live across the country. I would argue you should print at least one copy and share the digital version as a bonus, not the main event.
The contemporary small press world has been paying close attention to this shift. Independent publishers, zine makers, and photo book artists have turned the custom printed book into its own art form, and the tools available to everyday creators have never been better or more affordable.
How to Make a Photo Book: The Full Step-by-Step Process
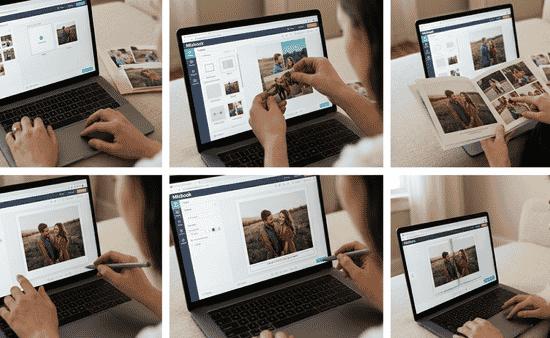
Here is the framework I call SCOPE: Select, Curate, Organize, Place, and Export. Walking through SCOPE in order keeps you from the most common mistake, which is uploading 400 photos and then staring at a blank canvas for two hours.
Step 1: Select Your Theme and Format
Before you touch a photo, decide what story this book is telling. A family vacation has a beginning, middle, and end. A year-in-review has seasons. A portrait project has a subject. Naming the story first determines everything: book size, page count, and photo book layout ideas you will reach for later.
Common formats include standard landscape (11×8.5 inches), square (8×8 or 12×12), and portrait (8×10). Square works well for Instagram-native photos. Landscape suits travel and group shots. Portrait is the natural fit for a single subject or a family portrait session.
Step 2: Curate Ruthlessly
A 40-page book with 80 strong photos beats a 100-page book with 300 mediocre ones. Go through your camera roll and pull only the shots that make you feel something or clearly advance the story. Delete the blurry ones. Delete the near-duplicates. If you have five almost-identical shots of the same moment, keep one.
For a typical 20-spread book, you want somewhere between 60 and 100 edited photos. That ratio leaves you enough variety to work with without overwhelming your layout decisions.
What Happens in the Book Verity similarly highlights how selecting and arranging details can shape the reader’s experience, making careful choices important when deciding what to include and what to leave out.
Step 3: Organize Into Chapters
Group your selected photos into three to five chapters before you open any design tool. Chapters become spreads, and spreads become sections of the book. This is the structural work that most tutorials skip, and it is why most amateur photo books feel scattered. How Does It Feel Book can also encourage readers to think about how sequence, pacing, and visual transitions shape the emotional experience of moving through a book.
A simple folder structure on your desktop works fine: name each folder by chapter, drag the photos in, and open the design tool only after you know what goes where.
Step 4: Place Photos With Intention
This is where photo book design actually happens. Every best photo book maker on the market offers pre-built templates, and using them is not cheating. It is smart. Templates are designed by professionals who understand visual pacing. Start with a template, then modify it rather than building from a blank page.
A few placement rules worth following:
- Open the book with your single strongest image on a full-bleed spread. No text, no borders, just the photo.
- Alternate between busy spreads (four to six photos) and quiet spreads (one or two photos) to give the eye a rhythm.
- Put text captions in a consistent location across the book, either always at the bottom or always in the gutter margin, never randomly.
- Save your second strongest image for the final spread. The last thing a reader sees is what they remember.
Step 5: Export and Order
Review your file at 100% zoom on screen before ordering. Check for blurry images, text that runs into the gutter, and white borders that feel accidental. Most platforms will flag low-resolution images automatically, but they will not catch compositional problems for you. That is your job.
The Best Photo Book Sites Compared
Knowing how to create a photo book online means knowing which platform matches your goals. The market has consolidated around a handful of serious players, and each one has a distinct strength.
| Platform | Best For | Starting Price (20 pages) | Standout Feature
|
|---|---|---|---|
| Artifact Uprising | Premium gift books | $49 | Thick lay-flat pages, sustainably sourced paper |
| Shutterfly | Family albums, frequent discounts | $14.99 | Deep template library, regular 40-50% off sales |
| Mixbook | Creative control, custom layouts | $19.99 | Most flexible drag-and-drop editor on the market |
| Chatbooks | Quick, casual books from social feeds | $10 | Auto-import from Instagram, subscription option |
| Blurb | Photographers, serious artists | $24.99 | InDesign plugin, bookstore-quality printing |
Among the best photo book sites listed above, my personal pick is Mixbook for most people. The editor is genuinely the most intuitive, their paper quality is solid for the price, and you have real control over photo book layout ideas without needing design software. Artifact Uprising wins on print quality alone if budget is not a concern.
Blurb is the right call if you are a photographer producing a portfolio or a small press creator making editions of ten or more copies. Their Blurb photo book tools include a desktop app and an InDesign plugin that serious designers will appreciate immediately.
Photo Book Ideas Worth Actually Making
The blank canvas problem is real. Here are five specific photo book ideas that translate well into print, with notes on what makes each one work structurally.
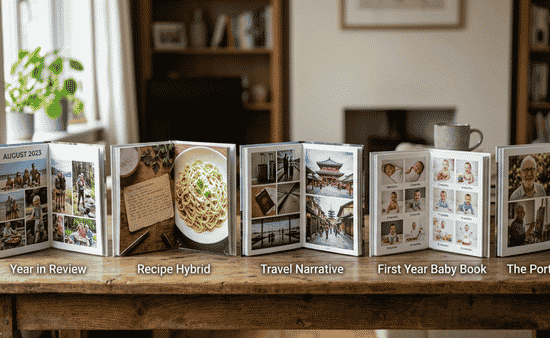
The Year in Review. Twelve chapters, one per month, three to eight photos each. This format practically organizes itself. It works especially well as an annual tradition because the format is the same every year, making comparison across editions feel intentional.
The Recipe Book Hybrid. Pair food photos with handwritten or typed recipes on facing pages. This is a particularly strong custom photo book idea for anyone who cooks seriously or wants to preserve a family member’s recipes alongside images of the actual dishes.
The Travel Narrative. Shoot with intention before the trip by including a few “before departure” photos, then let the journey unfold chronologically. End with one photo from home taken after you return. That bookend structure gives even a casual travel album real narrative weight.
The First Year Baby Book. Month-by-month documentation of a child’s first year. This is one of the most common uses of photo book printing services, and for good reason. The format has a built-in emotional arc that almost writes itself.
The Portrait Project. A single subject photographed across different contexts, seasons, or years. This works beautifully as a gift and is also one of the most compelling photo book ideas for photographers building a personal body of work.
How to Make a Family Photo Book That Everyone Will Keep
A generic family album becomes forgettable fast. Knowing how to make a family photo book that actually gets displayed and revisited requires a few specific decisions that go beyond just dropping family photos into a template.
First, include at least two generations. A book that is only about the immediate nuclear family misses the richness that grandparents, cousins, and extended family bring to the story. If you can dig out two or three scanned older photos, even better. A spread that pairs a 1978 photo of grandparents at the same age as today’s parents is something nobody puts down quickly.
Second, write captions. Not long ones. Just names, places, and years. Future generations will not know who is in the photo without that information, and adding it takes ten minutes total. This is the single most underused feature in every best photo book maker on the market.
Third, order two copies minimum when printing a family book. One for the oldest generation present in the book, one for the family archive. Photo book printing costs per unit drop slightly with volume, and reprinting years later is more complicated than ordering an extra copy now.
Understanding how to make a family photo book also means thinking about who will hold this book in twenty years. Make the font size large enough for older readers. Keep the cover image simple and identifiable. These are small choices with long consequences.
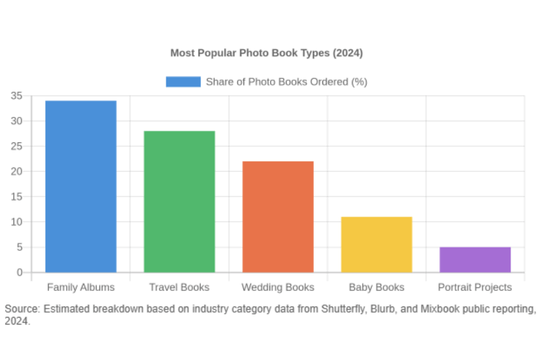
Source: Estimated breakdown based on industry category data from Shutterfly, Blurb, and Mixbook public reporting, 2024.
Photo Book Layout Ideas That Work on the Page
Good photo book layout ideas are not about decoration. They are about controlling where the reader’s eye goes and how fast they move through the spread. These are the layouts that print professionals actually rely on.
The Anchor Layout. One large image takes up two-thirds of the spread. Two or three smaller images fill the remaining third. The large image anchors the reader’s attention and provides context. The smaller images add detail. This is the most versatile layout in any photo book design toolkit and works for virtually any subject matter.
The Grid. Four or six images in equal-sized cells. Works best when all photos share a consistent subject, light quality, or color palette. Avoid grids when your photos vary wildly in tone because the rigid structure will make inconsistency painfully obvious.
The Full Bleed Spread. One image across both pages, edge to edge. Reserve this for your absolute strongest photos. Used more than twice in a 40-page book, the impact diminishes. Used once or twice, it stops a reader cold in the best way.
The Text-Forward Spread. Mostly white space with a quote, caption, or short paragraph and one small image. This layout gives the reader a breath between denser spreads and is essential in a long book. It also doubles as an elegant chapter divider.
Mixing these four layouts throughout your book, rather than using one type exclusively, is the difference between a photo book that feels designed and one that feels assembled. That distinction is what photo book design is really about.
How to Make a Photo Album Book vs. a Photo Book: Are They Different?
Technically, yes, though the terms are used interchangeably on most platforms. Knowing how to make a photo album book traditionally meant slip-in prints behind acetate sleeves in a ringed binder. That format still exists, but it has been almost entirely replaced by the bound printed book format that all the major platforms produce today.
The practical difference now is binding style. Perfect-bound books (like a paperback) are the most common and affordable. Lay-flat books (where the spine flexes completely flat when opened) are better for landscape panoramas and for spreads where you do not want a gutter crease cutting through an image. Hardcover options add durability and a premium feel.
If you are learning how to make a photo album book as a gift, lay-flat hardcover is the version most recipients keep permanently. It costs more, usually 30 to 50 percent above the base price, but the product feels fundamentally different in your hands.
“The photo book has become the primary archival format for personal photography in the 21st century. More people are printing books than ever before, even as print volume for individual photos has declined. The book is the new shoebox.”
This reflects a consensus position held by photo industry analysts and reinforced by the PhotoShelter community’s annual photography industry survey, which has tracked growing interest in printed photo books among both professional and amateur photographers since 2019.
How to Make a Photo Explained: File Quality and Print Resolution
Understanding how to make a photo explained properly means getting specific about resolution. This is the part most guides gloss over, and it is why so many first-time orders arrive looking soft or pixelated.
For photo book printing, you need images at a minimum of 300 DPI (dots per inch) at the final print size. Most modern smartphone cameras, including the iPhone 14 and later and most Android flagships from 2022 onward, capture images at well above this threshold. The problem is compression. If your photos were shared via text message, downloaded from Facebook, or saved from Instagram, they have been compressed and may print poorly at sizes above 4×6 inches.
Always source your files directly from your camera roll, Google Photos original quality export, or iCloud original download. Never use screenshots or social media downloads as your source files for printing.
For full-bleed double-page spreads in an 11×8.5 inch book, you are printing across roughly 22 inches wide. At 300 DPI, that requires an image of at least 6,600 pixels wide. Most modern smartphones max out around 4,000 to 6,000 pixels on their longest edge, so check your files before placing them on full-bleed spreads. Understanding this technical detail is core to how to make a photo explained in a way that prevents expensive reprints.
How to Create a Photo Book Online: A Platform Walkthrough
If you have never done this before, here is a concrete walkthrough using Mixbook, since it represents the clearest path for a first-timer learning how to create a photo book online.
Go to Mixbook.com and click “Create a Photo Book.” You will be asked to choose a size, theme, and page count. Select “8×8 Square” and “Classic” theme for your first project, then set the page count to 20. This keeps costs manageable and the scope achievable.
Upload your curated photos using the media panel on the left. Mixbook accepts JPG, PNG, and HEIC files. Once uploaded, drag your chapter opener photo onto the first page and resize it to fill the page edge to edge. This is your opening spread.
Work through each chapter group using the Anchor layout for most spreads and the Full Bleed layout for your two strongest images. Use the text tool to add captions at a consistent 10-point font in the bottom margin of each page.
When you are done, click “Preview” to see a simulated page-turn view of your full book. Look for images that feel too small, text that runs too close to the edge, and any spread where the content feels too dense. Fix those, then click “Add to Cart.”
That process, from upload to order, takes most people between 90 minutes and three hours for a 20-page book. Give yourself a full afternoon the first time. Your second book will take half as long.
Custom Photo Book Printing: Paper, Finish, and Cover Options
A custom photo book is only as good as the paper it is printed on. These choices matter more than most first-time buyers expect.
Paper weight. Most platforms offer standard (around 80lb text weight) and premium (100lb or above) paper. Premium paper is noticeably thicker, resists fingerprints better, and makes colors appear richer. For any book you intend to keep or give as a gift, choose premium.
Finish. Matte finish reduces glare and gives photos a fine-art quality. Glossy finish makes colors pop and is better for high-contrast action or nature photography. Semi-gloss, sometimes called satin, splits the difference and is a safe default if you are unsure. I default to matte for portrait and travel work, glossy for anything with bright natural color.
Cover material. Softcover is affordable and fine for casual books. Hardcover with a dust jacket looks the most like a traditional book. Hardcover with a printed image wrap, where the photo goes directly onto the cover board, is the most durable and the format most likely to survive on a shelf for thirty years.
These decisions directly affect photo book printing costs, but the difference between standard and premium options is usually only eight to fifteen dollars on a twenty-page book. That is a small price for a significant quality difference.
Making a Digital Photo Book to Share Before It Prints
A digital photo book in the form of a shareable PDF or online flipbook is worth creating alongside your print version. Most platforms allow you to export a PDF of your finished design before ordering. You can share that PDF via email or upload it to a free flipbook service like Flipsnack, which renders it as an interactive page-turn experience viewable on any browser.
This is particularly useful if you are making a family photo book and want relatives to see it before the physical copies arrive. It is also a smart way to get a second set of eyes on your layout. Send the PDF to one trusted person and ask them to flag anything that feels out of order or visually confusing. You will catch at least one mistake you missed.
The digital photo book is not the finished product. It is a preview tool and a sharing mechanism. Treat it that way.
How to Make a Photo Book on a Budget Without Cutting Corners
You do not need to spend $80 on a premium hardcover to get a beautiful result. These strategies keep costs down without sacrificing the things that actually matter.
Sign up for email lists on all major platforms. Shutterfly, Mixbook, and Snapfish all run 40 to 50 percent off promotions multiple times per year, typically around major holidays. If you build your book and then wait two weeks for a promo code, you will almost certainly find one.
Keep your page count at 20 to 30 pages. Most platforms charge per page above the base count, and the price per additional spread adds up quickly. A tight, well-edited 20-page book is more impactful than a bloated 60-page one anyway.
Choose a square 8×8 format. It is almost always the most affordable size offered, and the square format is well-suited to modern photography from phones and mirrorless cameras.
Batch your orders. If you want to give the same book to four relatives, ordering four copies at once is cheaper per unit than ordering one copy four times. This applies particularly to how to make a family photo book as a holiday gift.
Common Mistakes That Ruin a Photo Book
Here are the five problems that show up most often in first attempts at how to make a photo book, with the fix for each.
Too many photos. Curate harder. If every moment is highlighted, nothing is. Cut 30 percent of what you think you need and you will have a better book.
Inconsistent fonts. Pick one serif and one sans-serif font and use nothing else in the entire book. Every best photo book maker gives you dozens of font options. Ignore most of them.
Ignoring the gutter. The gutter is the inner margin where pages meet the spine. Images and text that run into the gutter get partially hidden when the book is bound. Keep anything important at least a quarter inch away from the gutter on each side.
Low-resolution images on large spreads. Covered in detail above, but worth repeating. Check your resolution before placing any photo on a full-bleed spread.
No cover thought. The cover is the first and last impression. Spend fifteen minutes on it specifically. A strong cover image, clean title text in a legible font, and a back cover that is intentional rather than blank makes the whole package feel finished.
How to Make a Photo Book for Small Press Creators
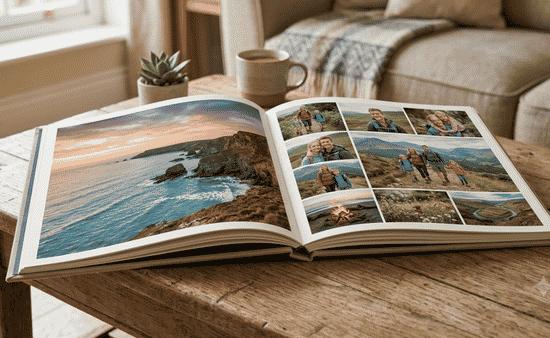
If you are reading this on The Contemporary Small Press, you may already be thinking about photo books as a publishing format rather than just a personal project. That is a legitimate angle, and the tools for it are better than ever.
Blurb’s print-on-demand model allows you to publish a photo book and list it for sale in their global bookstore without holding any inventory. You set your markup, Blurb prints and ships each order, and you collect the difference. For photographers and artists producing limited edition work, this model makes a run of ten or fifty copies economically viable in a way that traditional offset printing does not.
The photo book design process for a publication-grade book is the same as for a personal one, but the bar for consistency is higher. Every spread needs to hold up independently, sequencing needs to support a thesis or emotional arc, and the cover needs to communicate what a buyer is getting before they open it. Think of it as a zine with better paper and a spine.
Understanding how to make a photo book at this level is also understanding that the book is an object. Its weight, its feel in the hand, and the sound it makes when opened all contribute to how the work is received.
These are not precious concerns. They are part of the design. How to Fill Out a Receipt Book follows a similar attention to physical details, where clear handwriting, accurate information, and consistent formatting make the finished record practical and easy to use.
How to Make a Photo Book: A Final Checklist Before You Order
Run through this list before clicking “Add to Cart” on any photo book order.
- Every image is at least 300 DPI at its print size, and no image used on a full-bleed spread is below 4,000 pixels on its shortest edge.
- Text and important visual elements are at least 0.25 inches from the gutter and all outer edges.
- The opening spread features your strongest image with no competing elements.
- Captions are consistently placed throughout, same position on every page where they appear.
- You have used no more than two font families in the entire book.
- You have previewed the book in the platform’s full-preview mode and checked every spread.
- You have selected the correct paper weight, finish, and binding type for your intended use.
- If ordering multiple copies, you have verified the quantity before checkout.
- You have a discount code applied if one is available.
The Best Photo Book Maker for Different Situations
No single platform wins every category. Here is a direct recommendation by situation so you are not stuck comparing feature lists when you should be designing.
For your first book ever: Mixbook. The editor is forgiving and the results are reliably good.
For a premium gift: Artifact Uprising. The quality difference is real and worth the price for something that needs to impress.
For high-volume family photo books: Shutterfly. Wait for a sale code and the value is unmatched.
For a photographer publishing work: Blurb. The print quality and distribution options are built for serious use.
For quick, low-effort books from a phone: Chatbooks. No desktop required, no design decisions, just photos and a cover.
The best photo book maker is the one that matches your workflow and your end goal, not the one with the longest feature list.
Conclusion
Every photo you have taken and left sitting in a folder is a story that has not been told yet. Learning how to make a photo book is genuinely one of the most satisfying things a photographer or a family archivist can do, and the barrier to entry has never been lower.
Pick one story from your photo library today, a trip, a year, a person, and give yourself a Saturday afternoon to turn it into a printed object. The SCOPE framework gives you the structure. The platform comparison gives you a starting point. The checklist keeps you from expensive mistakes.
The real question is not which platform to use or what layout to pick. It is this: which of your photos deserves to exist as something you can hold?